MParticle is a customer data platform (CDP) for omnichannel consumer brands, making it easy to manage customer data along the entire customer lifecycle. Its integration with Antavo allows brands to synchronize their customer data and customer actions effectively.
This document shows how to configure the connection between the two platforms and how to synchronize events. Finally, two use cases will also be discussed in brief.
Find the configuration page of the mParticle integration module by typing ‘mparticle' into the search bar of the Modules ![]() menu.
menu.

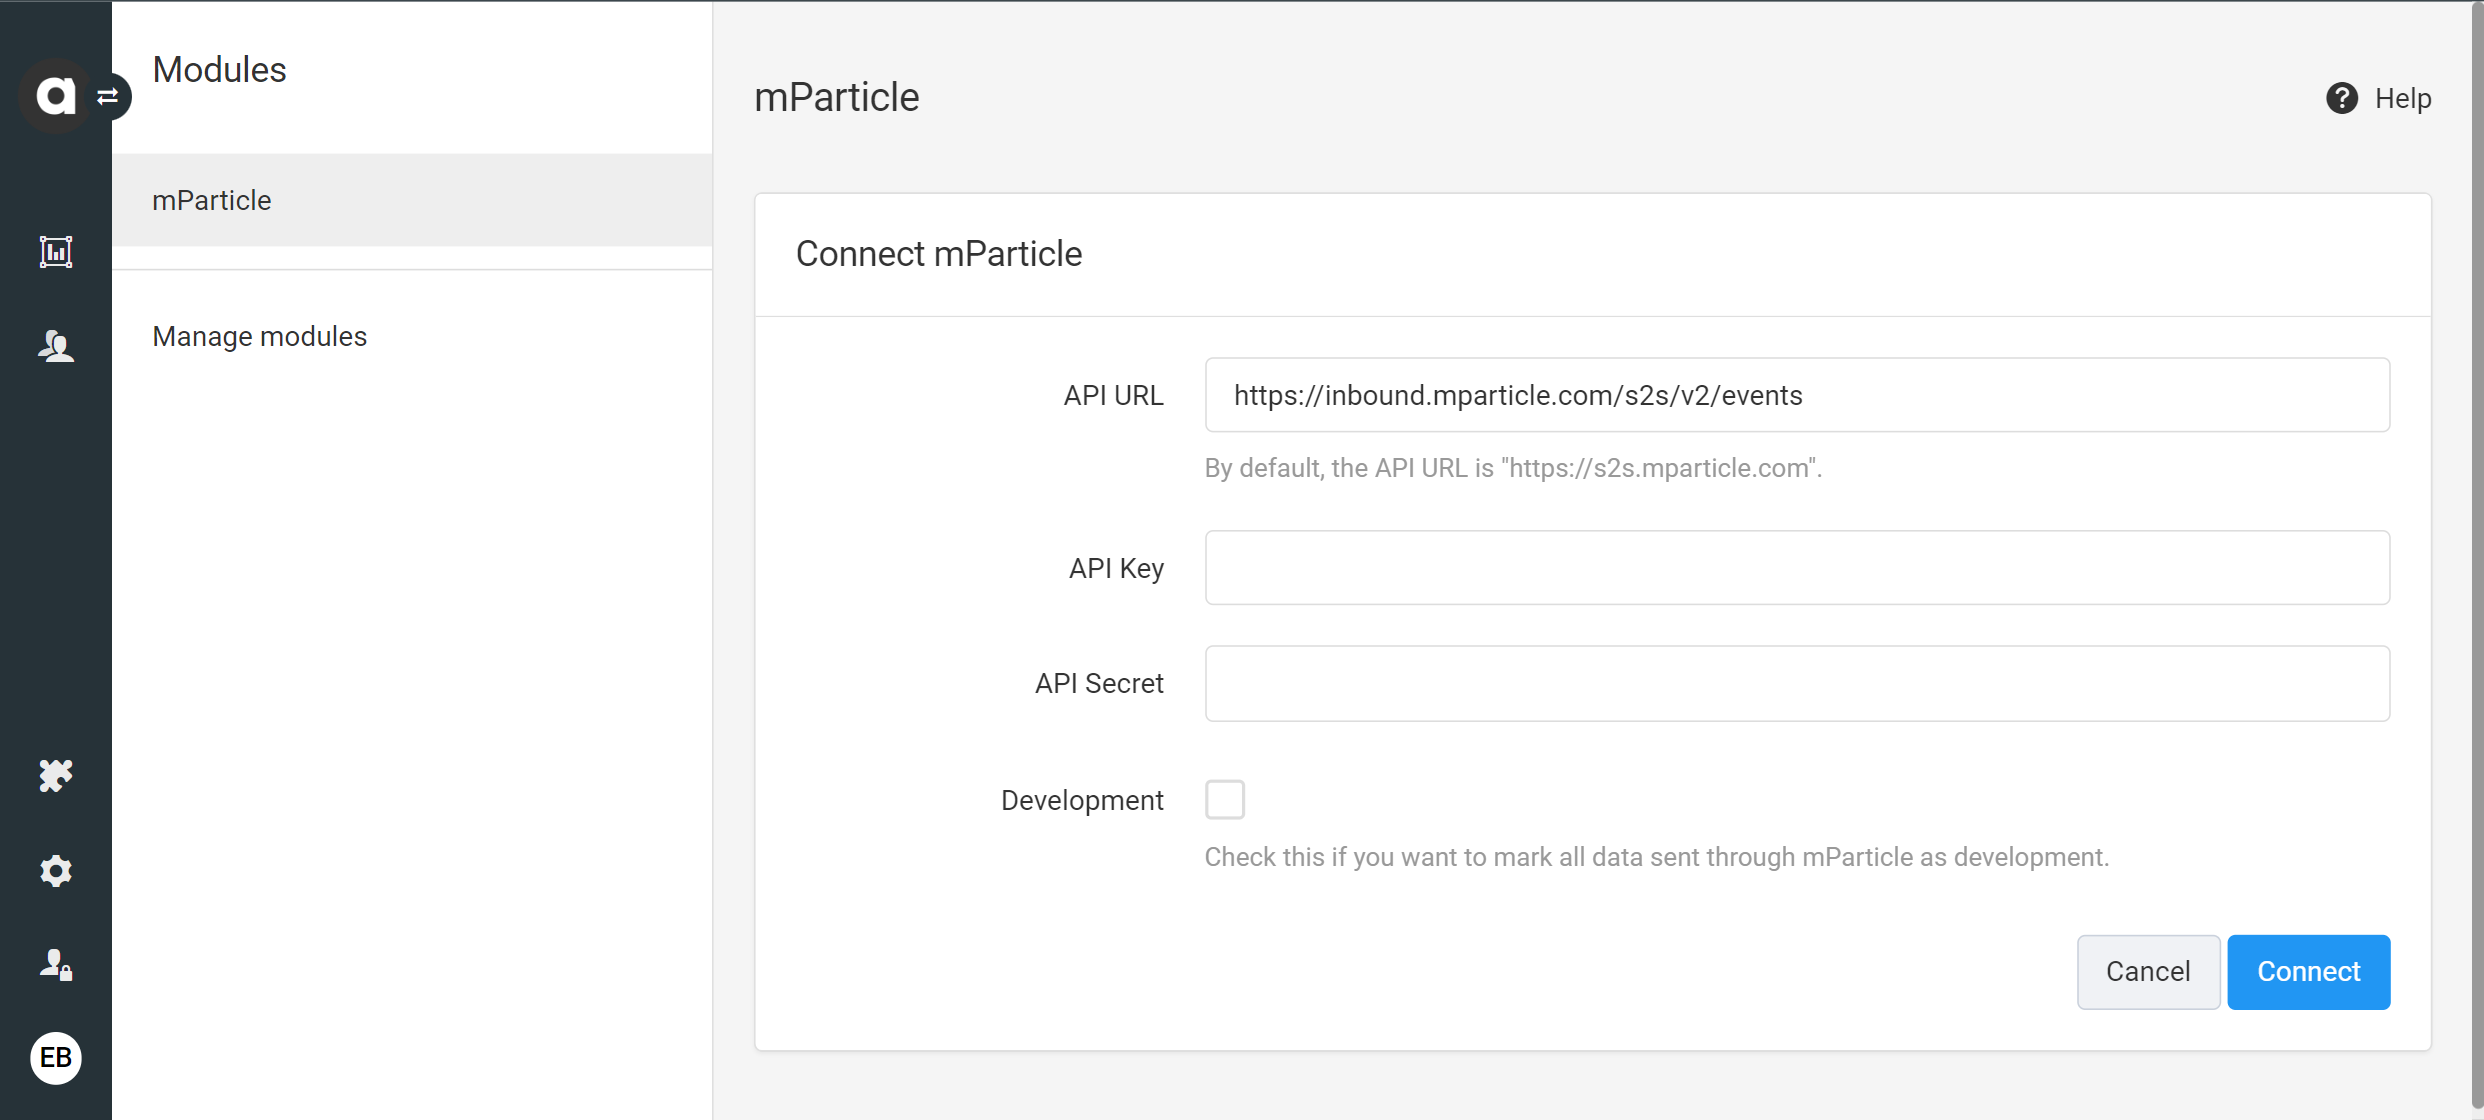
The module configuration requires an API URL, key and secret for setting up the connection.
This information can be found on mParticle’s platform. To obtain it, follow these steps:
Click on the Setup menu item on the sidebar.
Go to the Inputs sub-menu:
the page will open up to the available platforms
Navigate to the Feeds tab.
In the upper right corner, click the Add Feed Input dropdown and chose Antavo.
There will be a popup appearing with the Input feed configuration:
Provide a configuration name (mandatory)
Set the Feed status toggle to ‘Active’
Click ‘Save’
After saving, the API key and secret will appear.

The next step is to configure the connection in Antavo’s Backoffice.
Return to the mParticle module’s configuration page and fill in the Connect mParticle form accordingly:
API URL – type https://inbound.mparticle.com/s2s/v2
API key and API secret – paste the API key and secret to the required field from mParticle’s platform
Development – mark this checkbox if you wish the synced data to be treated as development data and siloed from your production data.
Click ‘Connect’.

After the connection is established, the next step is to configure the field synchronization between the two systems, including customer data synchronization under the Sync Fields page in Antavo’s Backoffice.
Click on 'Add new field ![]() ' .
' .
The items in the left column’s dropdown called Loyalty fields show the fields that are found within Antavo.
Remote fields represent the equivalent fields in mParticle.
Add more field mappings by adding new rows at the bottom.
Click ‘Save’.

The prefix ”$” before the remote field indicates that these properties are reserved attributes that drive specific behaviors in mParticle’s platform. The following list contains these built-in attributes:
"$age" "$gender" "$country" "$zip" "$city" "$state" "$address" "$firstname" "$lastname" "$mobile" |
Custom user attributes can also be defined within Antavo without using the ‘$’ prefix. These will be created in mParticle’s system and can be viewed under the Data Master page, as seen in the example of the customer_id or language on the screenshot below.
The ‘antavo’ prefix should be used so the custom fields are easier to identify for the mParticle users. For example: |

The mParticle module’s External events page allows you to configure custom events that can be pushed from Antavo to mParticle.
Click on 'Add association ![]() '
'
The items in the left column’s dropdown called Antavo events show the names of the events Antavo uses for various loyalty actions.
External events represent the equivalent actions in mParticle.
Add new events by adding new rows at the bottom.
Click ‘Save’.

See the use case at the end of this article for an example scenario of the outcome of this event synchronization.
Antavo has a resend mechanism and a Resend queue page within the module that queues the outbound messages. There is a service automation configured for these messages to be resent five times which results in clearing the queue. The messages might be resent if they:
fail because the connection was lost due to a timeout
fail because a rate limit of the customer’s mParticle account was hit (HTTP response 429)
fail because there was an internal server error in mParticle
There are two ways of synchronizing Antavo events with mParticle. One way is to go to the Workflows module and set up the synchronization, and another is to perform this through the mParticle module’s external events page.
This example shows how to push an automated email campaign based on adding points to the customer by setting up this rule.
Follow these steps to create this workflow:
Open Workflows management and click the Create new general workflow page.
Name the workflow and click ‘Create’.
Drag and drop an Event trigger node to the canvas from the right sidebar.
Define the type of event on which the workflow should run – this needs to be set to run on a Point Add event so that this workflow will be activated each time such an event occurs.
Click 'Update'.
.png?version=1&modificationDate=1652260696666&cacheVersion=1&api=v2)
Scroll down to the actions and drag and drop the Trigger marketing communication node to the canvas.
Type point_add as the event name (mandatory).
Select the type of the event as it appears in mParticle (mandatory).
Enter the key and value of the event data to be sent in the payload (the information about the event that needs to be sent to mParticle).
Add multiple data fields to the payload using the ‘Add’ button.
Click ‘Update’.

As soon as the points are added to a customer, the outcome of the workflow can be double-checked by clicking on the Workflow logs on the customer’s page in Antavo’s Customer Insights module, as well as mParticle’s Live Stream page if the Development mode checkbox is enabled.
.png?version=1&modificationDate=1661324971883&cacheVersion=1&api=v2)
Navigate to the External events page to provide the Field assignments and select the appropriate event type. In this example, the event is set for a reward claim scenario.
.png?version=1&modificationDate=1677685856700&cacheVersion=1&api=v2)
This way, when the customer claims a reward, the mParticle event goes through. The success of the event can be verified by going into the Live Stream log under the Data Master page, along with the claimed reward’s ID.
